Introduction
There are a lot of articles on building a home lab on the Internet. Some cover all manner of configurations, use cases, and technical need. What makes this article different is that most IT professionals that tend write about their home labs tend to fall into the following categories:
- Overkillers
- Aesthetics-driven
- Influencer-sponsored
Overkillers tend to have a lot of discretionary income, or are willing to carry a high amount of debt, to pursue the highest-powered lab that most closely mimic an enterprise IT environment. These folks have full 42U racks enclosures, blade chassis, converged networks, and a high-level of redundancy in some part of their home. In some cases, Overkillers spend more on their home lab than I’m willing to spend on a new family vehicle.
Aesthetics-driven IT professionals tend to value form over function. They want solid aluminum cut, retro-repurposed, art pieces in their home. As such, their home labs will have light effects, incorporate fish tanks, and all manner of cool looking effects.
Influencer-sponsored IT professionals are folks who either work somewhere with perks for their home lab or are trying to make a side-hustle blogging and have very nice home labs, but rarely put up the cash for their own environments. Instead they leverage demo units or seed funds from a sponsor to generate the configurations that they write about.
This article is for folks with budgets, kids, and an eye for practical solutions. In my case, I work hard to provide for my family, so that my wife can focus 100% on the hardest job in the world: full-time mom… As such, there are probably many IT professionals in a similar situation: they work, they want a home lab of their own, but they are also living within the constraints of budgets and don’t have corporate sponsors or a large pile of disposable income. If that sounds like your situation, then the good news is that this article is for you.
I will breakdown the steps of creating a home lab of your very own without breaking your budget. This guide can be customized to meet your own unique and individual needs. You can horizontally and vertically scale to add more performance, or adjust the role of different components to increase, decrease, or eliminated high-availability depending on your own individual needs. At the same time, all of the components of this environment, with a small bit of effort can be repurposed to other projects, given shifts in your interests, hobbies, and needs.
Overview
So, you’ve made it this far… TLDR folks have all clicked to other parts of the Internet or have decided to insert their credit card into a public cloud utility. That’s probably a good thing, as what I’m about to suggest you do at home takes goals and grit. You probably have some sort preconceived idea of what you are looking to get out of your home lab. Maybe you are a developer that needs infrastructure that doesn’t come with a high monthly payment. Perhaps you are a systems engineer who is being pushed to do some sort of “DevOps” project and want a sandbox where you can simplify the configuration to prototype. Whatever your particular reason for reading this guide, it’s important that you understand what you are about to undertake because this may not be right for your situation, or there may be easier endgame scenarios.
Goals
- Based on FOSS (Free Open Source Software)
- Increase cost-efficiency
- Reduced environmental impact
- Modular and affordable to scalable
- KISS – “Keep It Simple Stupid”
Constraints vs. Design Decisions
Powered by Linux
I will not be using MacOS, Microsoft Windows, VMware, or any commercial platforms or applications in the design or administration of this home lab. We will be using FOSS or Free Open Source Software; however, this home lab can be administered from various commercial platforms; however, the best experience end-to-end generally requires using Linux. If you’re not down with Tux, or just had to Google “Tux”, then this guide is probably not for you.
Linux addresses the following goals:
- Linux constructed of FOSS.
- Linux increases cost-efficiency by removing costly licensing and reducing the base hardware requirements when compared to Windows, MacOS, and VMware.
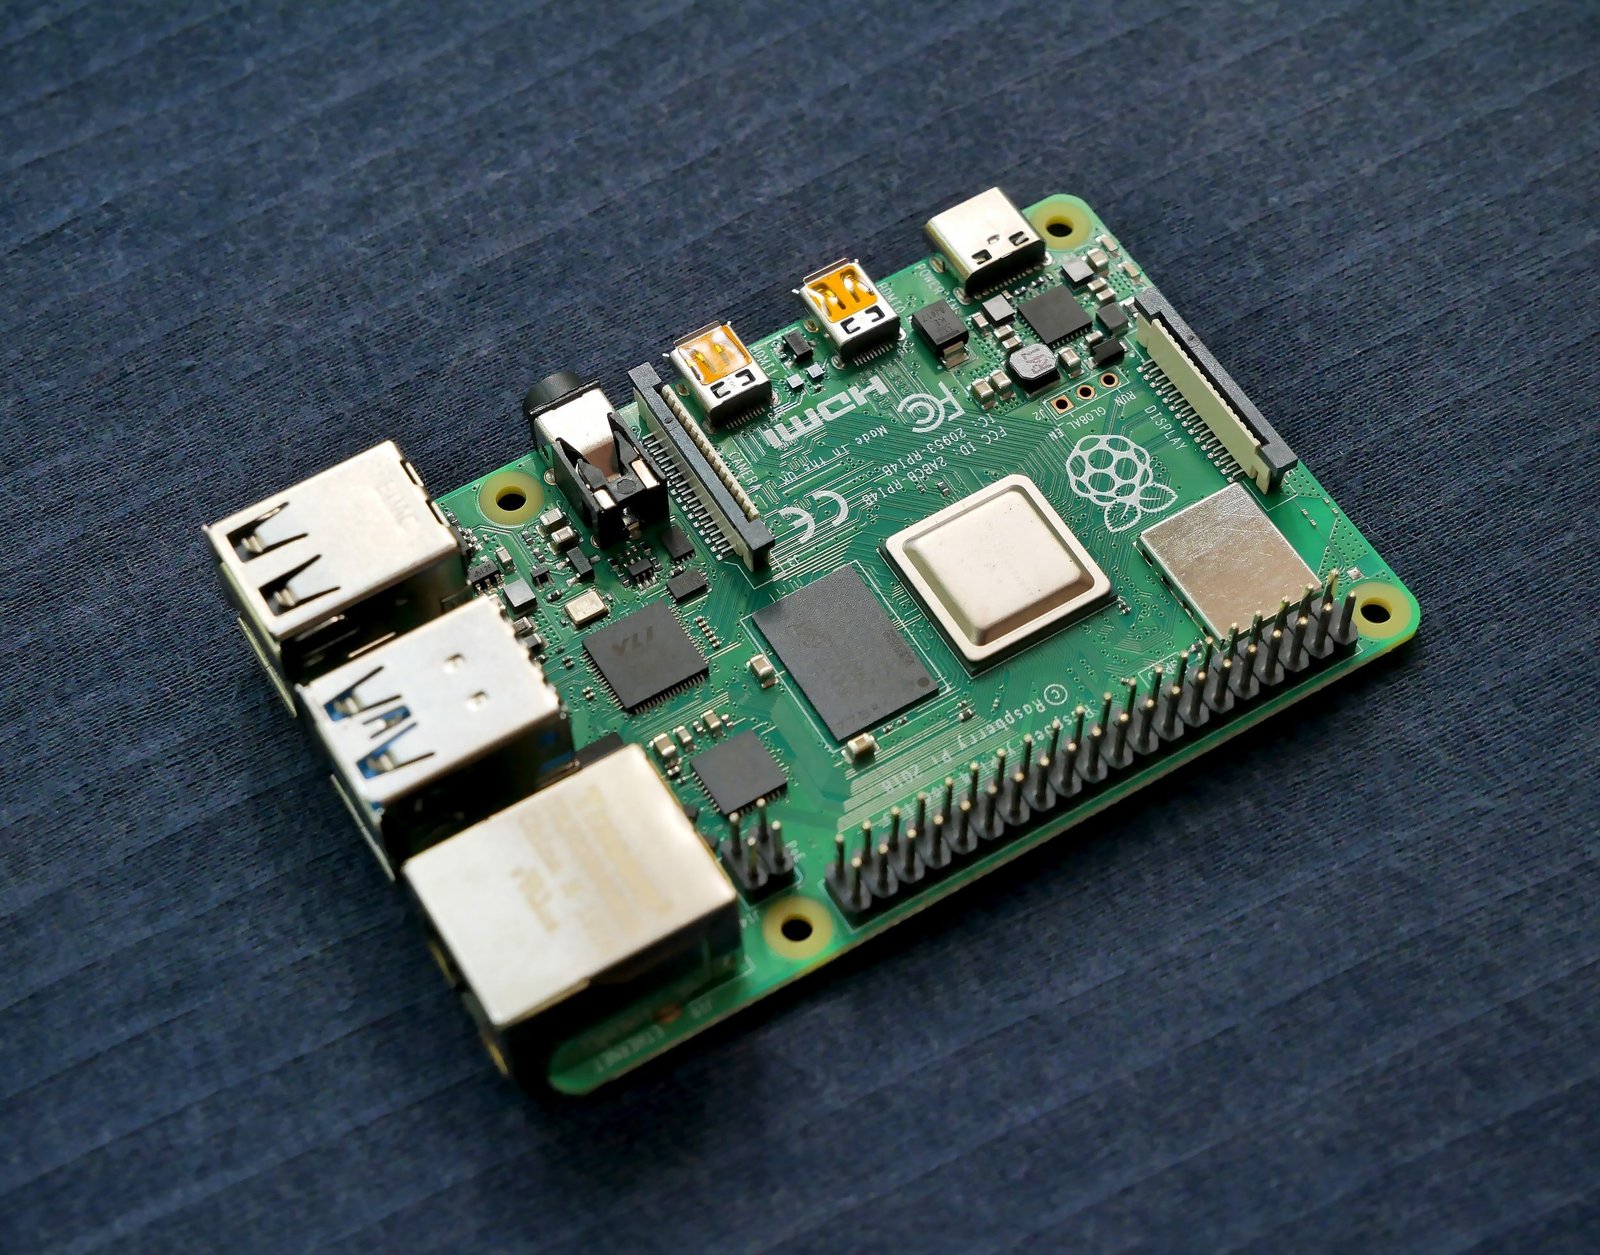
Executed on ARM with RPi 4B
This is inherent to leveraging a Raspberry Pi; however, it has special caveats. If you’re like me, you have a mix of amd64 PCs and various ARM systems (32bit/64bit). There are additional steps typically required to build container images that will run properly on Raspberry Pi 4B if your primary workstation is a non-ARM.
Also, many public container registries for popular software projects may lack ARM images all together, or just the specific ARM image that you need. In most cases, this can easily be mitigated by leveraging Docker’s BuildX function to create a proper container image for your specific needs.
RPi 4B’s ARM architecture addresses the following goals:

- RPi SBCs are cheaper than similarly-sized computers.
- The ARM architecture reduces environmental impact by producing less waste heat and consuming less electricity than AMD64 systems, as well as using less components and silicate.
- Raspberry PI 4B are modular and affordable to scale. They offer several different price points depending on the amount of built-in RAM.
- RPi SBC are easier to troubleshoot and maintain than traditional computers because they have less components.
Orchestrated by Kubernetes via K3s
While the actual installation and configuration of K3s is pretty trivial and extremely well documented, Kubernetes is not for the faint of heart. I recently heard Kubernetes described as:
Kubernetes is something that only someone with a Ph.D in Computer Science from Stanford University could love…
- Docker Employee
While there are volumes of documentation, labs, and free content on the Internet about Kubernetes, it will test your skills and resolve in ways that leveraging traditional hypervisors and bare-metal won’t.
Once you get past the shock and awe of the learning curve, Kubernetes container orchestration will give you all of the advanced functionality typically available on expensive enterprise platforms.
Using K3s addresses the following goals:
- Based on FOSS (Free Open Source Software)
- Increase cost-efficiency
- Reduced environmental impact
- KISS
K3s makes deploying a Kubernetes Node super-easy, as it contains less prerequisites than other full-stack Kubernetes deployments and it can all be managed from a single binary. Installation, uninstall, and upgrades are managed from a single command via that same binary. It has everything we need for deployment on amd64, armhf, and arm64.
One of the key reasons for using k3s is that it is right-sized for lower-end computers like the RPi 4B, while still being a fully compliant Kubernetes distribution.
Also, K3s can leverage either sqllte, etcd3, or an external database (MariaDB/MySQL or Postgres). This is key for most home lab users that may need to calm the chattiness of etcd I/O requests on a network booted RPI, by shifting those requests to a external database backed by SSD or higher.
For more information, check out https://k3s.io
Required Hardware
While your own particular needs will necessitate what is required, this is meant to help folks ascertain a starting point for their home lab budget.
Shared Storage
You will need a reliable form of shared storage. This can be an old computer capable of hosting CIFS/NFS shares/exports and ideally iSCSI targets. The faster the storage, the better your home lab’s potential performance will be, but it’s OK if you don’t have the money for a massive array of NVMe or SSD storage. Start small and scale-over-time. Also, in most cases, inexpensive SATA HDDs will still get the job done.
1Gbps Physical Network
Faster is always better, but since we’re dealing with Raspberry PI 4B, there isn’t a compelling reason to over-invest in your physical network. At present, 1Gbps networking is ultra-affordable and many decent switches can be had for below $20 USD (including tax and shipping). If you want to leverage enterprise or prosumer switches for advanced configuration, I highly recommend making a regular search of eBay for great deals on surplus network equipment. I’m a big fan of HPE Procurve switches, and they regularly can be found with limited lifetime warranties for 70-90% off the retail price on eBay from reputable sellers. The number of ports required to support your home lab will vary depending on scale. Try to not buy more capacity than you need. You can always scale up and out with this design.
If an enterprise switch seems like overkill, I’m also a big fan of TP-Link switches. They are priced for humans on budgets. They will get the job done and offer great performance.
Also, don’t cut corners on your cabling. Tested/certified CAT6 or better Ethernet cables are cheap. Trust me your home lab will be complicated enough. You do not to waste your time troubleshooting stability issues related to your physical wiring.
Raspberry Pi 4B SBCs
These will provide your home lab’s compute and memory capacity. There is no hard and fast rule about how many of these you need total; however, for the suggested home lab build, you’ll need at least one to get started, and at least 2 in order to support an HA configuration with K3s (external database required).
Recommended Hardware
I’ve found the following additional hardware to be beneficial to my homelab experience:
Hosting Shared Storage on a NAS
Network Attached Storage (NAS) is invaluable in your home lab. It allows you to easily scale up, centralize storage operations, backups, and even host “helper services”, like DNS, PXE Boot, and so much more. If you’ve been following and reading my blog, you’ll know that I’m quite fond of Synology NAS products. They provide a plethora of features, are easy to configure, and allow you the ability to recover from configuration mistakes and disasters with ease. This will of course increase your budget quite a bit, but you could probably use one of these devices in your home to also:
- Reduce the dependency on cloud services and eliminate recurring monthly subscriptions.
- Centralize your home network’s backups and file services.
- Serve up your photos, music, and movie library for your family and TVs.
- Host numerous other valuable services.
- Level-up your home lab!
There are a ton of Synology models to choose from and it may seem like this is a budgetary sinkhole. Units without drives can range from $100 USD into several thousand depending on the options. I’ve always been a big fan of the Plus-Series models. These models generally allow a greater level of expansion of both storage and RAM. They also have a great balance of features and performance, but here are the features you’ll probably want most:
- RAID Protection
- iSCSI
- NFS/CIFS
- Support for BTRFS (Snapshots & Snapshot Replication)
- Support for 2 or more drives
- NAS-Grade HDDs/SSDs (5900 RPM drives or better are required)
The Plus-Series models will support all of this and many more advanced features that might save you from needing a “Helper” computer described in the next section, but it depends on the amount you are willing to invest in your Synology. It is possible to purchase a 2-Bay Plus-Series model with a set of capable drives for sub-$600 USD.

Picking out a decent NAS can be daunting, as there are numerous design decisions depending on your use cases. My best piece of advice after years of using various Synology models is that if you stick with the Plus-Series and you run into scalability issue, it can generally solve it either with reconfiguration or money.
2-Bay models take up less space, but the cost of drive expansion modules often are more than an entire second unit. 4-bay or larger units generally will give you more storage scalability (without using a drive expansion or replacing disks), but they will take up more space.
Newer models in the Plus-Series also have NVMe M.2 slots which can be used for read and write cache. This allows you to leverage slower HDD drives that provide cost efficiency for higher capacities, while buffering the performance impact with high-speed cache.
Everything I’ve built in my home lab leverages a DS-716+ with 2 Seagate Ironwolf NAS drives (5900 RPM) in a Synology Hybrid RAID 1 with no SSD or NVMe caching tier. RAID 1 or 10 will generally offer no upfront performance penalty vs RAID 5 or 6. Again, more drives, higher speed drives, drive cache, NAS cache tiers, and RAM cache can all help offset potential performance bottlenecks.
Remember, you can always spend more later. The key is to be efficient by making smart purchases that you can reuse and refactor if your needs change. Avoid investing in “what might be really cool”. Solve problems with money only when absolutely required.
Computer /w SSD or better – “Helper”
Ideally, for this home lab you have a least one “Helper” computer that you can use primarily to run Linux and PostgreSQL or MySQL/MariaDB to offload high speed I/O operations from your NAS. While you can sometimes host databases on a NAS, most folks tend to put slower performance, larger capacity SATA HDD drives that will be saturated by the constant IO generated by my recommend home lab configuration.
In my case, I have a Mini PC with an Intel Celeron and 8GB of RAM with a Samsung SSD that hosts the database that drives my home lab. Why did I chose run a Celeron Mini PC?
- It’s cheap
- Celerons, like RPis, tend to use much less power than other processor lines
- It’s really small on my desk and looks cool
- It supports SSD
- It can easily run Linux and a database
Some of you may be thinking, why not just use another RPi SBC and an external SSD drive? Hell, why not just use a virtual machine on your primary system? Well, you totally can, but for me, I wanted something aesthetically pleasing on my desk that had a bit more horsepower than an RPi. In almost all cases, the built-in interfaces in a Celeron Mini PC will be faster than an RPi. Also, a Celeron Mini PC will come with a case, cooling unit, and power supply too. By the time you source something comparable with a fully-loaded RPI, you’ve pretty much justified the cost of a Celeron Mini PC. And while a virtual machine will save you from buying any additional equipment, it’s not convenient to have to shutdown your home lab whenever you need to restart your primary workstation.

There’s no need to break-the-bank on this. Look for older models with Linux compatibility. Amazon.com has numerous options, as well as many other retailers. If you’re spending more than $200 USD on this, then you’ve spent too much.
RPi Cluster Enclosure / Bramble
While you are free to purchase a case kit for each of the RPis used in this project or just have SBCs and wires laying around everywhere, it’s probably more efficient, as well as less expensive, to purchase a bramble or a cluster enclosure to house the RPis. There are a wide variety of options and styles at various price points, but I recommend that you consider a solution that supports fans for integration of active cooling. Most of these can be sourced around $20 USD.
Design of your Home Lab

As you can see from the above layout, there’s not a whole lot of mystery to the physical topology. You could logically partition your network and segment traffic, but doing so adds complexity and cost. Again, the focus of this guide is to get you something usable quickly, efficiently, and without a lot of overhead, but applying enterprise best-practices when thinking about your particular design is always worth considering.
Network Booting
The biggest limiting factor of the RPi 4B is not necessarily memory, CPU, or network. It is its storage interface. This is where you’ll either need to leverage your “Helper” computer and/or your Synology NAS to offset this limitation. I’ve written and published a comprehensive guide to network booting Raspberry Pis that can assist with this configuration.
Prep RPis for running K3s
Once you have your Raspberry PI 4Bs successfully booting off of network storage, you will need to make the following OS configuration modifications:
- Disable Swap
- Enabling legacy iptables on Raspbian Buster
- Enabling cgroups for Raspbian Buster
- Enable the arm64 kernel in config.txt:
arm_64bit=1 - Ensure that your initramfs/followkernel line in config.txt points to the correct arm64 kernel dependencies (assuming kernel version 5.10.63):
initramfs initrd.img-5.10.63-v8+ followkernel - Build arm64 Linux Kernel Dependencies on each node (required for iSCSI)
pi@raspberry:~ $ sudo update-initramfs -v -k 5.10.63-v8+ -c - Reboot
ARM 64-bit Kernel
While the arm64 kernel is not required to install and run K3s, you will find that there are more mainstream container images available for arm64 than there are for 32bit arm kernel versions. Also, there may be additional performance advantages, but your mileage and needs may vary.
Prep “Helper” Computer for supporting K3s
Next, you’ll need to prepare your helper computer for supporting K3s by making the following modifications.:
- Install nginx (if not already installed)
- Configure nginx to serve as a load balancer for K3s server nodes on TCP port 6443
- Install K3s compatible external database
- Create a database/schema solely for use by K3s.
- Add database user specifically for K3s to the database created in the previous step and make it the owner of the database. (Instructions vary based on Database Engine Selected)
Fixed Registration Address
You will need to use local hostfile entries or DNS to create a fixed registration address via your nginx load balancer to provide HA functionality for your home lab.
Here’s a link to the relevant docs for creating a fixed registration address for K3s.
Install K3s Server Nodes
K3s ‘server nodes’ are the Kubernetes equivalent of master nodes. You will need at least one in your cluster. Server nodes are not wasted solely on cluster operations. They will also be used to schedule other non-administrative pods. You can achieve a highly-available (HA) configuration by using 2 server nodes in combination with the external database server on your “Helper” computer. This can be a great option, as the Kubernetes control-plane creates regular I/O which can saturate slower, larger SATA HDDs. By offloading this to your external database on the “Helper”, you will not create any I/O impact on your network booting RPis. It also eliminates the need for 3 or more server nodes to support a traditional etcd HA configuration. Again, HA is optional, but having it will allow your home lab to avoid having a single point of failure, as well as allow you to simulate partial control-plane failures against your deployments.
Here is a link to the relevant docs for crafting the single command line to install your server nodes.
Install K3s Agent Nodes
K3s ‘agent nodes’ are the Kubernetes equivalent of worker nodes. This is where the majority of your pods will be scheduled. Agent nodes do not have the overhead of running elements of the Kubernetes control-plane like server nodes. In general, workloads are scheduled on agent nodes until there are capacity issues, in which case pods will then be scheduled on server nodes as needed. In most cases, the majority of your nodes should be configured as agent nodes.
Here is a link to the relevant docs for crafting the single command line to install your agent nodes.
High-level Architectural Diagram

Diagram Sourced from Rancher Labs’s website.
This diagram, provided by Rancher Labs, illustrates the configuration of all the critical pieces and describes a 3 server node + 3 agent node cluster (6 nodes total) with an external database and load balancers.
In most cases, you can do all that you need from a single nginx instance configured on the “helper”.
Reference Configuration
In my current home lab (at the time of publishing this article), has the following configuration:
- 2 Server Nodes (2 x RPi 4B 4GB Model)
- 2 Agent Nodes (2 x RPi 4B 8GB Model)
In my configuration, I use the lower RAM capacity nodes for cluster management-related activities, as Kubernetes tends to try to orchestrate all work on the agent nodes as much as possible, so there are generally a high-level of idle resources on the server nodes.
Also, with Kubernetes there is no requirement to have like-nodes. If you wanted to have your server nodes powered by RPi 3B+ nodes, or VMs on a spare PC, it will all work together; however, a key element to remember is that when you are scheduling and orchestrating workloads, you cannot expect a differing architecture to be supported on all nodes.
For example, you cannot schedule an amd64 container image on a RPi running an armhf or arm64 kernel. The inverse is also true. If you decide to leverage a mixed architecture cluster, you can avoid creating cross-architecture container images, but you may find that your amd64 images are only being scheduled on amd64 processors and your arm-based systems will be idle most of the time.
Tips and Tricks
Administrative Tools
So at this point, you’ve most likely assembled the first iteration of your home lab and you should feel a sense of accomplishment, but if you’re like me and Kubernetes still feels new and a bit unfamiliar, it can help to have a some GUI tools to help visualize what’s going on in your home lab environment.
Because of the strong documentation provided by Rancher Labs, you may be tempted to deploy Rancher Server. Rancher Server is a Kubernetes cluster management service which is very powerful and full of integration and cool features. I certainly recommend giving it a solid look; however, I’ve found the overhead of installing it and it’s various pieces a bit overkill for managing an RPI-based home lab.
I recommend using the Lens IDE by Mirantis Inc. to help you with monitoring, administration, and situational awareness in your home lab. It’s free and supported multiple platforms and is a game changer for managing Kubernetes.
Kubernetes Storage Provider
Now that hopefully your home lab is built and stable, one of your first challenges to overcome will be the need to manage persistent storage.
By default, only the local-path provider is installed with the K3s. This will work, but it is not ideal for HA configurations unless leveraging a clustered filesystem. Clustered filesystems add complexity in backup, recovery, and system requirements. In most cases, trying to reuse services that you already have in your toolbox is a better option for home lab workloads.
One of my favorite solutions to this has been the Kubernetes SIG project nfs-subdir-external-provider, as this particular project lets you dynamically provision Kubernetes persistent volumes as sub-directories of a single NFS mount which is ideally hosted on your Synology NAS or possibly your “Helper”. The net effect is that using persistent volumes is simplified and efficient, while not causing node affinity issues in your cluster.
While your mileage may vary, it’s a great place to start.
Discover more from Warmest Robot + Warmest Human
Subscribe to get the latest posts sent to your email.